
Spring has sprung and you know what that means – it’s time to get in the garden and start digging! I’m sure you’re similar to me and can’t wait to get your seeds planted. Once you plant, though, there’s that terrible waiting period. How long does it take peppers to grow, anyway? (The answer is a long time if you want to put them in your salad tomorrow.) And if you’re a newbie to the gardening scene, you may even be wondering how to grow organic vegetables in general.
Luckily, there are some scrumptious vegetable varieties that grow incredibly fast. If you plant the following organic veggies now, they could be ready to grace your plate by early June. Also: If you’re unsure about how to grow organic vegetables, we've given you some information to get you going. Score!
How to grow organic vegetables in a 30-day growing period
Micro greens, such as pea shoots, sunflowers and beet greens, will sprout in fewer than 20 days. All you need to do is sow your vegetable seeds (regular seeds, or micro green seeds) in a sunny, outdoor spot. The soil temperature should be in the 50- to 65-degree range. If you prefer, plant your greens indoors in a tray with potting soil. Sprouts should appear in three to six days. After a few more days, trim the micro greens and eat their nutrient-rich goodness.
Arugula is another great, fast-growing green. This aromatic salad staple can go from seed to plate in about three weeks. Plant it in window boxes, containers, or in a garden bed.
Mustard greens are quick growing, too. The Osaka purple variety produces leaves in about 30 days. And Black Seeded Simpson lettuce takes a mere 28 days to develop leaves! The last of the greens, and one of everyone’s favorite salad ingredients, spinach, takes 35 to 40 days to develop baby leaves.
Here’s one fast-growing vegetable that isn't green: the Cherry Belle radish. This variety takes about 25 days to develop. These radishes are small and round, and easy to grow.
How to grow organic vegetables in a 45- to 60-day growing period
Unlike most other tomato varieties, Glacier tomatoes are cold tolerant and will set fruit when temperatures are only in the sixties. If all goes well, you’ll have 2- to 4-inch tomatoes in 55 days. However, they will disappear fast if you have a freeze. Another tomato that can develop quickly is the small, orange Sun Gold. It can be ready to pick 57 days after you plant it.
Contender bush beans take 49 days to produce string less, 6- to 8-inch pods. These beans are easy to grow and can be used in a variety of summer dishes.
Sugar Ann snap peas take about 56 days to produce 2½-inch pods that are edible. Also: Sprouting broccoli will show florets in about 50 days — it takes 10 days to germinate.
Finally, the hybrid Ya ya carrot can mature in about 56 days!
Note: If you’re worried about a cold snap zapping your budding, fast-growing vegetables, you can protect seedlings. Just cover your plants with black plastic or an overturned black container. Check the plants daily.
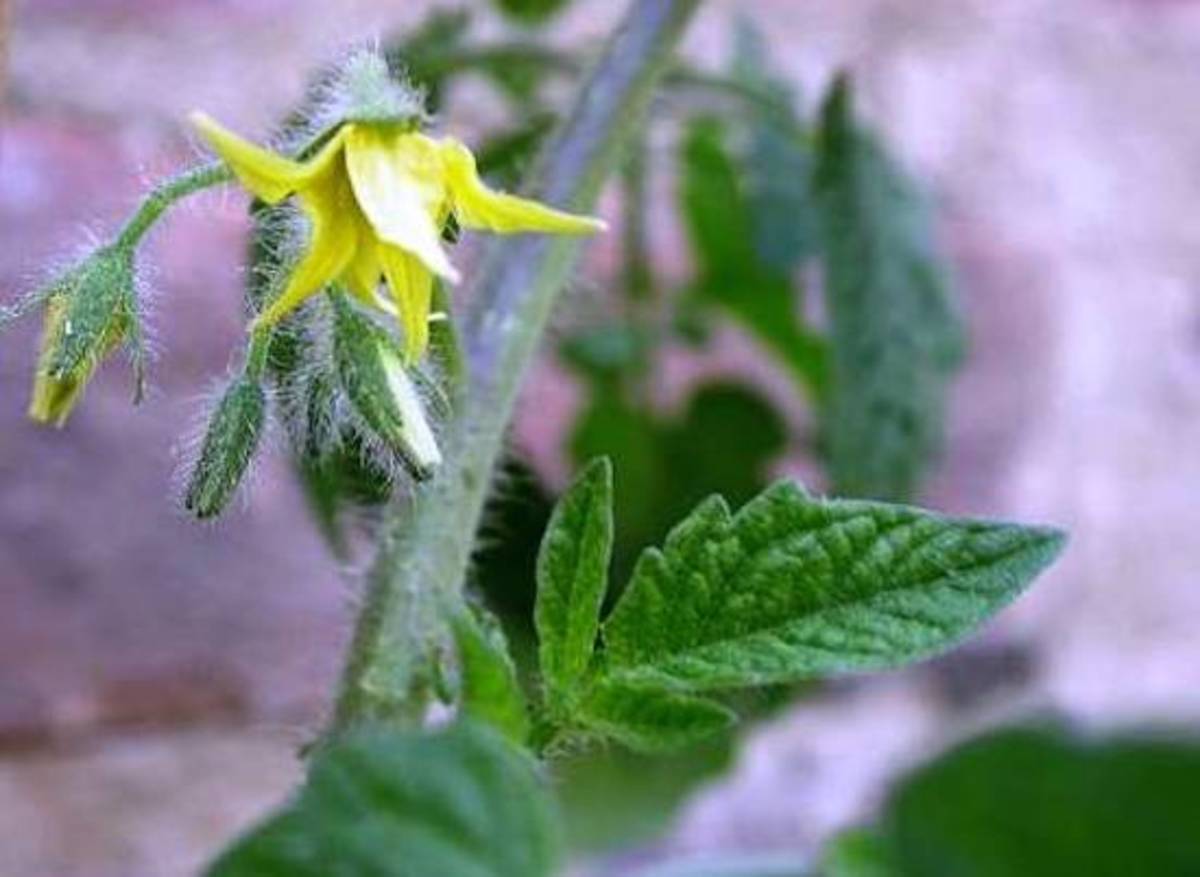
Understanding the reproductive systems of plants is a key to successful long-term gardening and seed saving techniques. Many fruit bearing plants need a pollinator, such as an insect or the wind to transmit pollen to turn their blossoms into fruits. Self-pollinating plants however grow their own “perfect” flowers that can transmit their own pollen without external help. Learn more about how to work with this type of plant in our short guide on self-pollinating vegetables!
Types of Self-Pollinating Plants
Some of the most common self-pollinating vegetable plants include lettuces, legumes such as green beans, Lima beans and snap peas and member of the Nightshade family such as peppers, tomatoes and eggplants. There are certainly some varieties that aren't self-pollinating, but most of these plant do not open their blossoms before the pollen has been released. This release pollinates the blossom while it is still closed, and allows the fruit to set as the blossom matures.
Cross PollinationSometimes the same vegetables of different varieties (e.g. two different types of peppers) can cross pollinate with the help of insects and create a seed that won’t produce a pepper anything like the one the seed grew in. There’s no need to worry about cross pollination between different types of vegetables (e.g. tomatoes and eggplants) but try to plant different varieties of self-pollinating vegetables at least 10-20 feet apart from each other. This is especially important if you have an outdoor garden, as insects do gather pollen from self-pollinating plants as well as ones that don’t self-pollinate.
Saving SeedSaving seed that is true to its parent plant is most efficiently done with heirloom varieties that are self-pollinating. The success rate for growing exact copies of the parent plant is highest with these types of vegetable plants (especially tomatoes and beans), reaching about 95 percent statistically. This is why growing heirloom tomatoes are such a satisfying and popular practice among gardeners.
TipsSelf-pollinating vegetable plants can suffer from inadequate light or watering. The fruit set can also suffer if early summer temperatures climb above 90 degrees, as this causes the pollen inside the blossom to become inadequate.
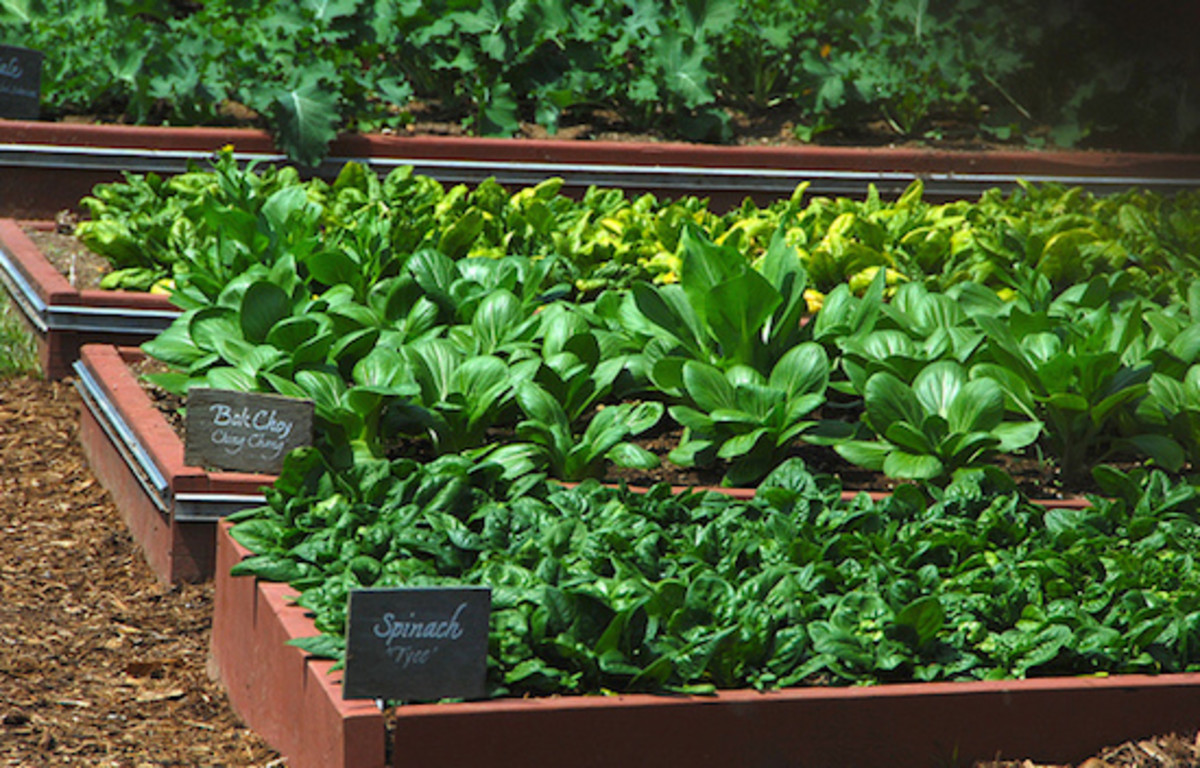
Asian greens are very versatile and healthy veggies that can be prepared in numerous ways. From bock Choi to mustard and Chinese cabbage, Asian greens are excellent sources of vitamins A , C and K, and provide an ample amount of calcium. Learn how to organically grow Asian greens in your fall garden with our quick guide on planting, caring for and harvesting these irresistibly delicious vegetables!
Climate and VarietiesAsian greens prefer shorter and cooler days, making them the perfect choice for fall gardens or cold frames. There are 3 main types of Asian greens:
Climate and VarietiesAsian greens prefer shorter and cooler days, making them the perfect choice for fall gardens or cold frames. There are 3 main types of Asian greens:
Crispy and crunchy - This group includes plants like bock Choi, Chinese cabbage and Chinese broccoli.
Leafy greens - This group includes relatives of mustard greens such as mustard spinach, tats oi, Izanami and red-leaf mustard.
Flowering greens - These are essentially Asian greens that belong to the brassiere family, and flower into yellow or white blossoms perfect for steaming or stir-fry's.
PlantingLate summer is the best time to plant Asian greens, or 12 weeks before the first estimated frost in your area. If your soil is warm and dry, you can sow seeds directly, otherwise start your plants in a greenhouse or cold frame. Asian greens do best in fertile, moist and well-drained soil with fairly neutral acidity. They love the sun, and need regular watering. Sow the seeds about 1/4 inch deep and 2 inches apart into loosened and sifted soil.
CareWeed your Asian greens regularly, and thin them as necessary. Some pests that may attack Asian greens are flea beetles, aphids and slugs. Control flea beetles, aphids and nematodes with diluted dish soap spray, or any other organic pest control method. Slugs will likely have to be hand-picked off the plants during the night, and make sure not to leave any mulches or other daytime hiding places for slugs too close to the plants.
Harvesting & StoringThinned baby Asian greens can be enjoyed in salads for an added texture and flavor. Once the leaves mature, harvest them individually or harvest full grown crowns by cutting them off at the base with a sharp knife. Asian greens can survive early winters and light frosts if covered overnight, but should be harvested as soon as the first hard freezes hit. Individual leaves will keep up to a week and whole crowns and heads will keep up to a week in cool storage (or the refrigerator). Large crops can always be blanched and frozen or dehydrated.

As summer slowly gives way to fall, we’re all looking for ways to use up the last of our favorite summer ingredients. You pick up the last few pounds of tomatoes at the farmers market, pick your last few zucchini, and, of course, you prune your summer herbs. But instead of using them up now, consider putting all that effort you put into growing herbs all summer long into adding flavor to your winter pantry.
Growing herbs is far less expensive than buying fresh every time you want to use a bit in dish. In the same way, preserving your summer herbs for winter can be the ideal way to keep all that flavor on hand without the extra cost… not to mention you know just how organic your home-grown herbs are! Depending on the herb you have and how you want to use it later, try one of our techniques for preserving your summer herbs for winter.
1. Drying Herbs
Dried herbs don’t have nearly the punch of flavor as fresh herbs do, but in a pinch, dried herbs can add quite a bit of aroma to dishes… particularly if you choose herbs that lend themselves well to drying. Rosemary, thyme, sage and bay are all herbs that are just as tasty dried as fresh. If you are looking to conserve those herbs, why not try our DIE for home made dried herbs. Make labels for glass jars, fill them up with your newly dried herbs, and presto! Your pantry will thank you for it.
You can even take advantage of your label-maker and add some homemade spice mixes to the shelf too.
2. Freezing Herbs
Freezing herbs on their own can bruise them, which isn't always a big deal, especially if you’re going to be adding them to sauces or stewed dishes. But in order to keep the most flavor in your herbs, try freezing them not on their own, but in good-quality olive oil. Windowsill garden herbs like basil, mint and chives which oxidize easily but pack a flavor punch are ideal for this method.
For individual portions of herbs that you can easily add to sauces and stews, use an ice-cube tray to freeze herbs in small blocks, then store them in the fridge.
3. Refrigerate Herbs
Stashing herbs in the fridge can help with freshness for a short period of time, but long-term, you’ll have to be a bit craftier. Add herbs to things like homemade pesto, marinated cheese or roasted tomato sauce. Their flavor will be at the peak of freshness going into the dishes, and the added oil and sugar in the recipes will help them keep much longer than they would alone.

What better way to get your kids or students into appreciating good, organic food than by getting them into the garden? Read our fun ideas on gardening with kids this fall and start a green thumb project in your own backyard or school lot!
1. Provide them with a space of their own to cultivate
Kids will be more interested if they have their own space to cultivate and become responsible for. Make sure you set them up in a spot with plenty of sunlight and healthy soil, as success is what they will want to strive for. Also provide them with durable tools (not breakable plastic ones) to acknowledge the importance of the work their doing in the garden.
2. Decorate the garden!
Decorate your garden to make it feel more like a verdant wonderland with statues, homemade stepping stones, wind chimes and garden stakes and hanging ornaments. You can even build secret hideaways and structures for them to play in. Kids have wonderful imaginations and providing some characters to let it run wild will make their time in the garden feel more magical.
3. Plant varieties that attract butterflies and other beneficial insects
Butterflies are mesmerizing and elegant creatures that kids love to spot, so planting fall blooming flowers like asters, late blooming seduces, milkweed and goldenrod to enjoy these insects late into the season. These plants will also attract other insects that you can spot and identify together for a fun afternoon activity!
4. Rainy Day Activity: Make a garden map and plant labels
If it looks like you have a rainy weekend ahead of you, get crafty and help your kids make a map of the garden, plotting out where certain plants are growing or where certain ones were the previous season. You can also have them make labels for plants in the garden or starts seeds to be planted in a greenhouse or poly tunnel.
5. Care for your perennials
Fall is the best time to mulch your weeded and pruned perennial bushes such as blueberries, cane berries and perennial flowers. Kids love spreading mulch, so get them together with a wheelbarrow, some shovels and rakes and let the mulching begin!
6. Plant a tree..or many trees!
It’s best to plant trees once the they have dropped their leaves, but the soil is still warm enough for their roots to acclimate. Tree planting is a wonderful activity for the whole family, and such an environmentally beneficial one. And how cool will it be to see the tree grow alongside your kids!
7. Time to compost
Fall is the perfect time of year to get your last layered compost for the year going. Have the kids help you gather the different layers (mowing the lawn if they’re old enough) and work together to create the mound, which they can check the temperature of the next day and be amazed!

I have a confession to make. I don’t normally eat breakfast. I’m just not hungry, so around 10 am I make a local egg irritate and then around 3 pm I make this chocolate smoothie recipe. Yes, I love it so much that I make this raw chocolate smoothie or another healthy smoothie recipes nearly everyday.
It’s so healthy, I don’t feel an ounce of guilt for this sweet treat. And it never gets old. Here’s my take on a raw and super healthful milkshake.
I’m a big fan of making healthy smoothie recipes with Gravitas Naturals Organic Cacao Powder but there’s a number of other brands on the market. Raw cacao is beneficial because of its antioxidant amp. It has Slavonic, a powerful antioxidant compound that’s especially potent in cacao beans. In fact, it has a higher antioxidant capacity than black tea, green tea, and red wine.
I use local, raw honey for sweetness and raw banana for extra sweetness and creaminess. Here’s the deal with your non-dairy milk source. If it’s going to be raw, you need to make it yourself. You can make your own coconut milk or your own nut milks. If you buy processed non-dairy milk, it’s not raw (I’m not advocating one side or the other here, just letting you know).
No comments:
Post a Comment